20 Feb 2018
Together with friends we decided to join efforts and administrate our own online services. We had some issue when setting up virtualization on Debian Stretch and I wanted to share what we learned.
We chose to use what we believe to be the “most standard” solution: KVM with QEMU, and libvirt. I expected it to work out of the box and I was wrong. Following the Debian Wiki was instructive but not sufficient.
We want to install a VM running Debian Jessie on a host running Debian Stretch.
Installation
sudo apt install qemu-kvm libvirt-clients libvirt-daemon-system
sudo adduser <youruser> libvirt
sudo adduser <youruser> libvirt-qemu
What about checking libvirtd service status ?
sudo systemctl status libvirtd
And you might get errors like:
dnsmasqCapsRefreshInternal:741 : Cannot check dnsmasq binary /usr/sbin/dnsmasq: No such file or directory
virFirewallValidateBackend:193 : direct firewall backend requested, but /sbin/ebtables is not available: No such file or directory
virFirewallApply:916 : internal error: Failed to initialize a valid firewall backend
To fix those errors, we had to run:
sudo apt-get install ebtables dnsmasq
sudo systemctl restart libvirtd
Creating a new Guest
Using Virtual Manager
The Debian Wiki says “The easiest way to create and manage VM guest is using GUI application Virtual Machine Manager” but does not provide information on how to set it up.
I first tried to connect to the host machine from virt-manager installed on my laptop and got the following error
libvirtError: End of file while reading data: sh: nc: command not found
Pretty straightforward to fix you say? You have to install netcat on your host machine. But not any netcat, netcat-openbsd
sudo apt-get install netcat-openbsd
If you install netcat-traditional, it will raise the following error:
The remote host requires a version of netcat/nc which supports the -U option.

Using the Command Line
sudo virt-install --virt-type kvm --name yunoprod \
   --memory 8192 \
   --location http://cdn-fastly.deb.debian.org/debian/dists/jessie/main/installer-amd64/ \
   --extra-args "console=ttyS0" \
   -v \
   --disk path=/vm/yunoprod.img,format=raw,size=45 \
   --os-variant generic \
   --os-type linux \
   --vcpus 4
For some reason –os-variant debianjessie does not exist anymore.
And there we run in the following error:
ERROR Requested operation is not valid: network 'default' is not active
Which is fixed (until next reboot) by:
sudo virsh net-start default
To be continued…
08 Feb 2017
Description
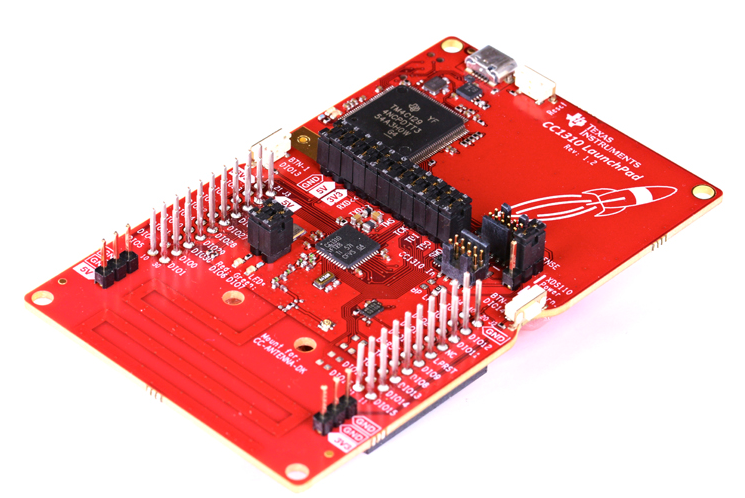
I try to use the CC1310F Launchpad by TI to communicate with the Sigfox infrastructure.

Connecting with SmartRF
On Windows, run the SmartRF program. You should see two connected devices (one CC1310 LaunchPad has two interfaces).
Select the XDS110 Class Application/User UART.
At first, the device is “Unknown”. You have to select the target device. I have a CC1310F128.

Right clic and “connect”.
By default, the bootloader mode was not enabled so I got the following message:

To enable the bootloader mode, hold the “SELECT” button (BTN-1, on the left) and press the “RESET” button (on the top).
Then try to connect again and you should see the following:

You can now get board information such as the MAC address (we will need it soon).
Getting CCS project from Sigfox
The only way I found was to send an email to tech-pi-team@sigfox.com and ask for it. They replied with 3 hours.
Getting the Sigfox_data.h from TI
Send an email to sigfox@list.ti.com with the MAC address, your name and the company you work for.
They should reply with one sigfox_data.h per device.
Compile CCS project (GNU/Linux)
- dowload and install CCS from official TI Wiki (I used 7.0.0)
- dowload and install TI-RTOS here
- I first had the following error with TI-RTOS version 2.21:
Description Resource Path Location Type: identifier UARTCC26XX_HWAttrsV1 is undefined CC1310DK_7XD.c /TI_SIGFOX_CC13xx_v0.13 line 133 C/C++ Problem
I then installed a previous version (2.18) following this post.
It did not work.
I restarted CSS.
It worked.

I then found that I had to change UARTCC26XX_HWAttrsV1 to UARTCC26XX_HWAttrsV2 for it to work with the TI-RTOS version 2.21.
Flash the project onto the board
- select the green bug to run the debugger (that will flash the board)
- if you don't put the board in bootloading mode (as described in the first section), you will get errors:


Connect to the terminal (I use minicom) with the following parameters: 115200 8N1
I got a nice: Initialization error
This is because I have to replace the file sigfox_data.h by the one that TI gave me.
- replace the file apps/sigfox_data.h with the one provided by the TI support
- select the green bug to run the debugger. It should be successful this time
Getting the Device ID and PAC number
Once the board is flashed, you can connect throught the terminal (minicom). No message should be displayed. To see what you are typing, enable “local echo”.
- Write the following and press enter: `AT$ID?``
A wild 8 digits device ID appears !

- Write the following and press enter: `AT$PAC?``
You should get a 16 digits PAC number.
Activate your device
Activate you device using your device ID and PAC number on: https://backend.sigfox.com/
If it does not work, send an email to Sigfox again. I got a reply within a day. My device was activated after 3 days.
Send message
I had to change the MODE on the sigfox_demo.h file because I’m in Europe:
//#define MODE_ARIB
#define MODE_ETSI
Sigfox Backend Callbacks
On the sigfox backend, you can create callbacks to trigger some remote function or forward data.
Here is what I’ve done:

I am sending the data in Json to a node-red instance on IBM Bluemix.
References


